Welcome to Hexocto Gif Maker! This tool is designed to make screen recording and animation creation as simple and privacy-focused as possible. Hexocto is ready to use out of the box with no installation or account required. Unlike other "online" recorders, Hexocto uses your browser's local power to process everything.
- No Server Uploads: Your video data never leaves your computer.
- Privacy-First: No account required, no tracking, no data collection.
- 100% Free: No subscriptions, no watermarks, no hidden costs.
1. Starting a Recording
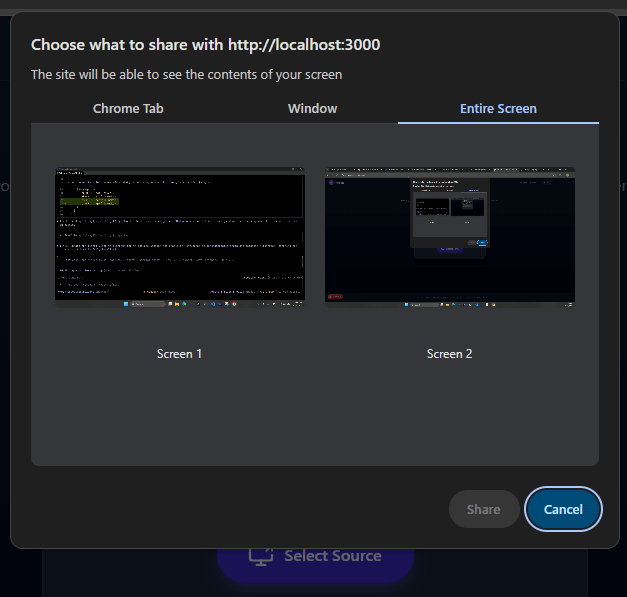
To begin, simply click the Select Source button on the home page. Your browser will prompt you to choose what to share:
- Entire Screen: Good for capturing workflows across multiple windows.
- Window: Perfect for recording a specific application.
- Chrome Tab: Ideal for recording a specific website.
2. Refining Your Capture
Once you've selected a source, you'll enter the "Preview & Crop" stage.
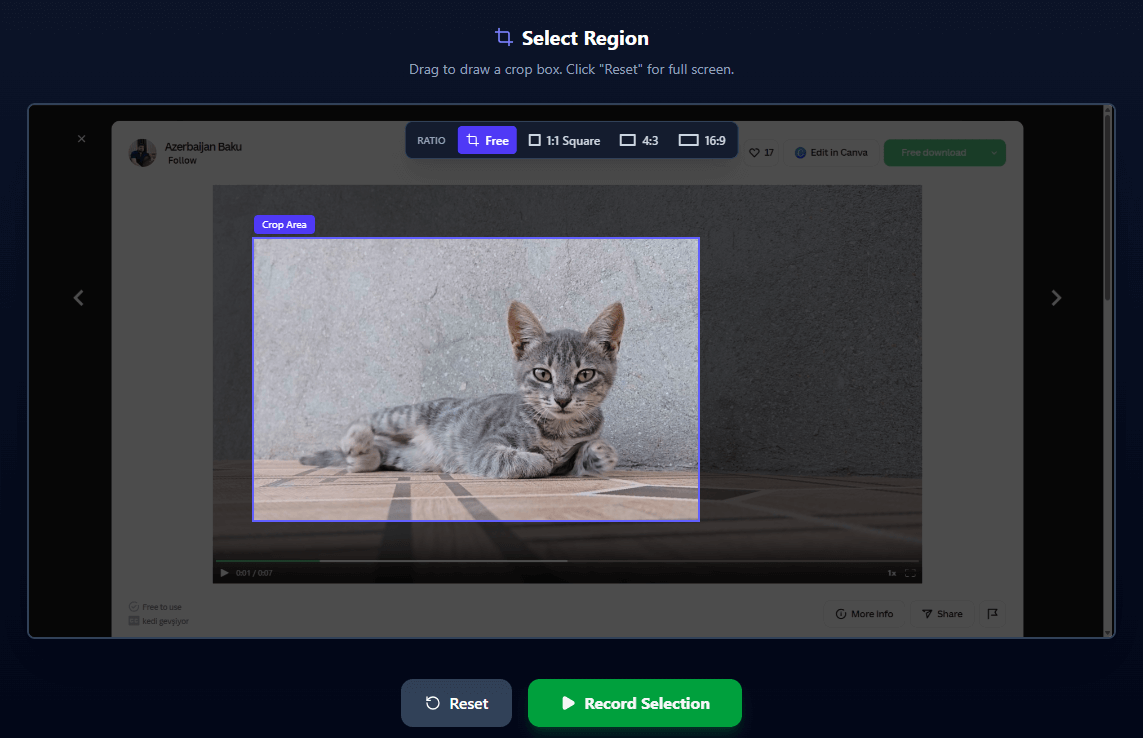
- Full Screen: By default, we record the entire source.
- Crop Region: Click and drag on the preview to draw a box. The recorder will only capture that specific area. This is great for hiding toolbars or focusing on a specific UI element.
3. Recording
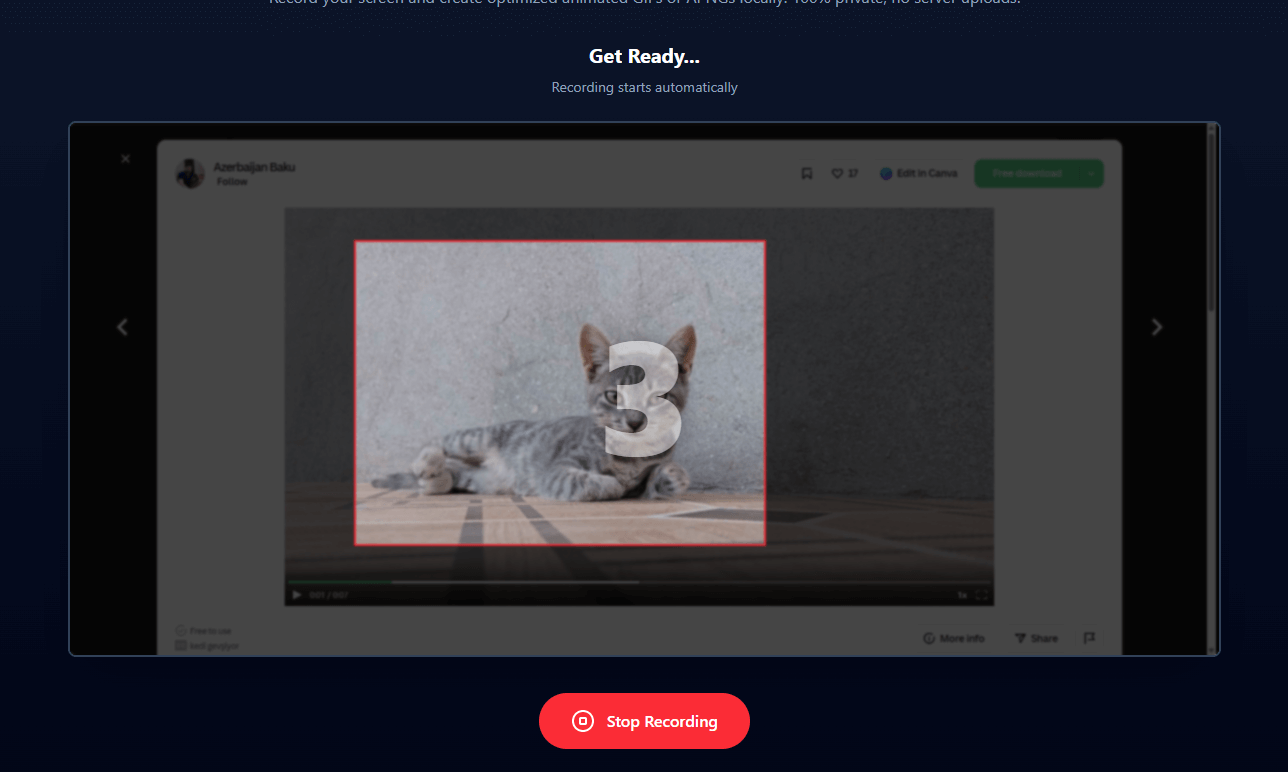
Click Start Recording. A 3-second countdown will appear, giving you time to switch focus to your target window. Perform your actions, and then click Stop Recording when you are done.
4. Editing
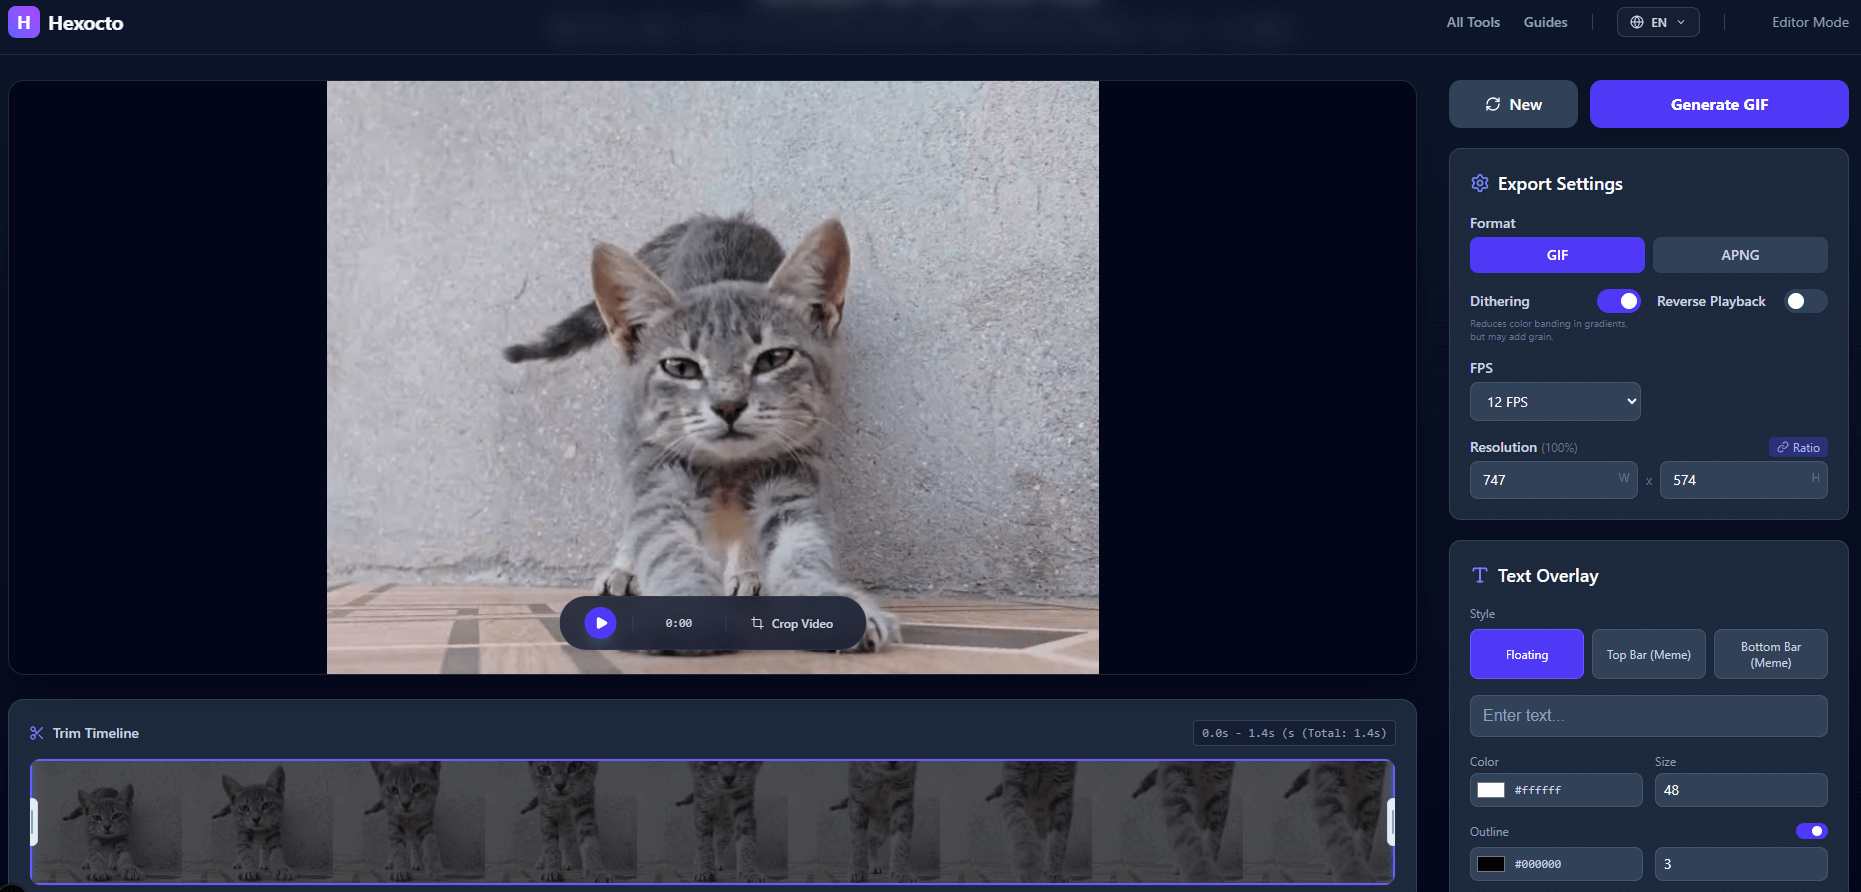
After recording, you'll be taken to the Editor. Here you can:
- Trim: Drag the handles on the timeline to cut out the beginning or end of your clip.
- Resize: Change the output dimensions.
- Text Overlay: Add watermarks or captions.
5. Exporting: GIF vs APNG
Which format should you choose?
GIF
- Pros: Universally supported everywhere.
- Cons: Limited to 256 colors, no partial transparency, larger file sizes for complex scenes.
- Tip: Use the "Dithering" option to make gradients look smoother.
APNG (Animated PNG)
- Pros: Full 24-bit color, supports alpha transparency, often better quality/size ratio.
- Cons: Not supported on some very old browsers (but works in all modern ones, Discord, iMessage, etc.).
Happy creating!